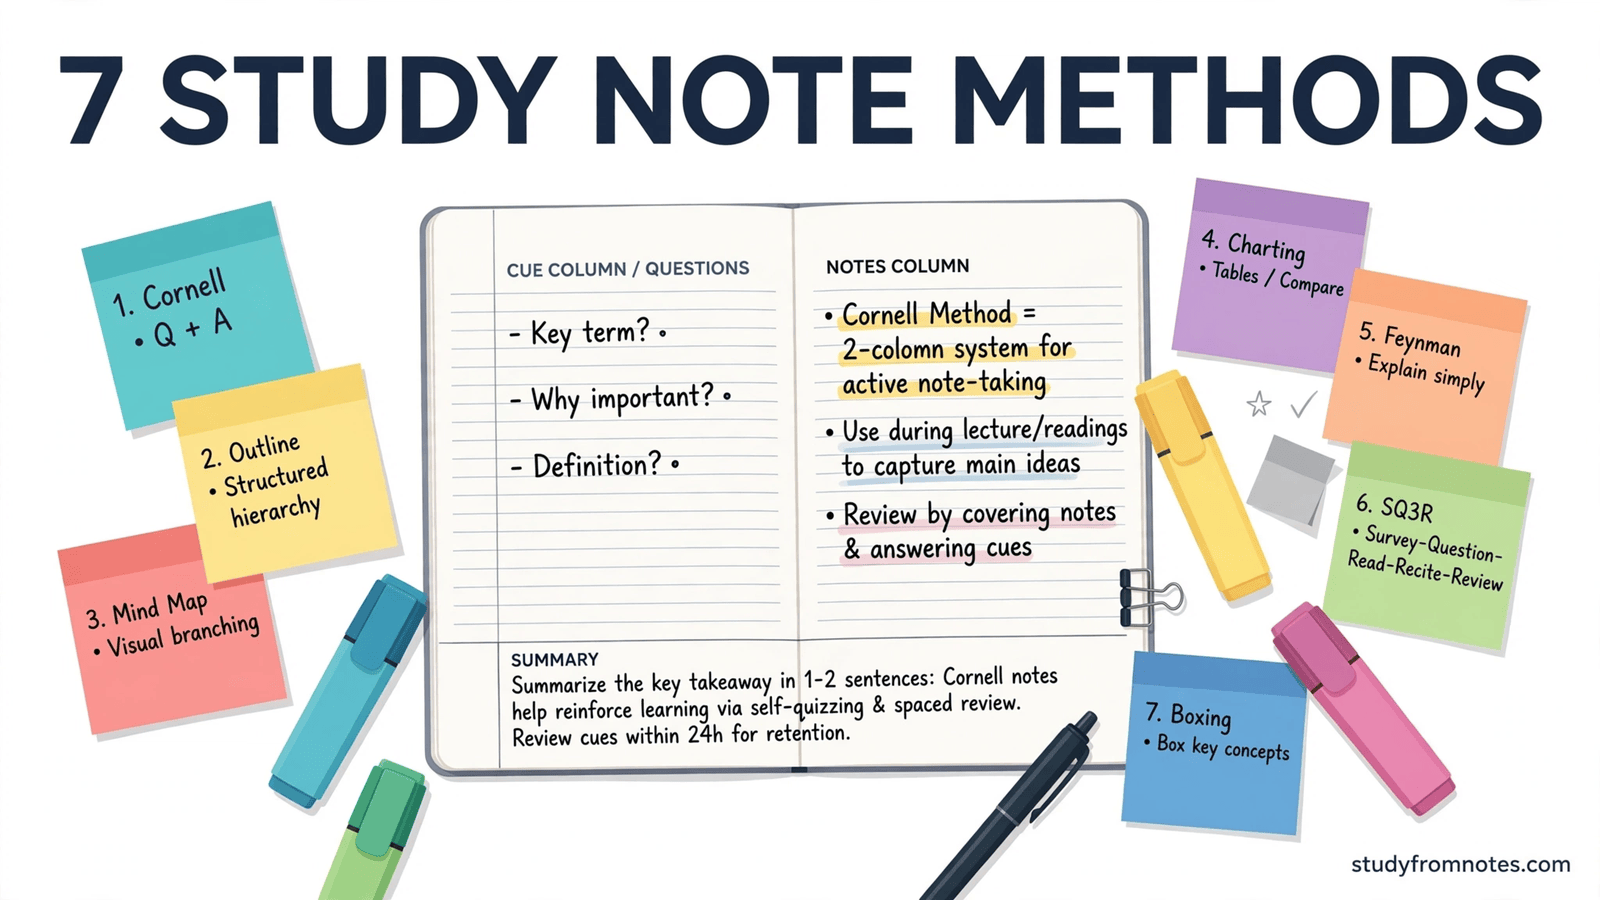
Effective study notes are short, structured, and written in your own words. There is no single best method: the Cornell method suits lectures, mind maps suit subjects full of connections, and the charting method suits comparisons. What matters more than the method is the habit. Students who rewrite material and test themselves from their notes consistently outperform students who only reread the textbook. Below are seven proven note-taking methods with original worked examples, plus a free Cornell notes template you can download and print.
Contents
- What Makes Study Notes Effective?
- 7 Study Note Methods, With Worked Examples
- Which Method Should You Use for Your Subject?
- Free Cornell Notes Template
- 5 Mistakes That Make Study Notes Useless
- Frequently Asked Questions
What Makes Study Notes Effective?
Effective study notes are a condensed, self-made record of what you must remember, organised so you can revise without reopening the textbook. Good notes use your own words, capture only the key ideas, and include cues or questions that force you to recall the material instead of just rereading it.
Notice the three tests hidden in that definition. First, condensed: if your notes are as long as the chapter, they are a copy, not notes. Aim for roughly one page of notes per ten pages of textbook. Second, self-made: borrowing a friend’s notes feels efficient, but the learning happens while you decide what is important enough to write down. Third, recall, not rereading: the best notes contain questions you must answer, not just statements you can skim.
7 Study Note Methods, With Worked Examples
To keep the comparison honest, every method below is demonstrated on the same topic: photosynthesis. That way you can see exactly how each method handles identical material, and pick the one that fits how your brain works.
1. The Cornell Method
Developed at Cornell University in the 1950s, this is the most researched note-taking system in the list, and the best default choice if you only learn one method.
How to do it, step by step:
- Divide your page into three zones: a wide notes column on the right, a narrow cue column on the left, and a summary strip along the bottom.
- During the lecture or reading, write only in the notes column. Capture ideas as phrases, not full sentences.
- Within 24 hours, fill the cue column with questions and keywords based on your notes.
- Write a two to three line summary at the bottom in your own words.
- To revise, cover the notes column and answer the cue questions aloud.
Worked example: photosynthesis
- Notes column: “Photosynthesis happens in chloroplasts. Light-dependent reactions occur in thylakoid membranes: water is split, oxygen released, ATP and NADPH formed. Calvin cycle runs in the stroma: CO2 fixed into glucose using ATP and NADPH.”
- Cue column: “Where do the light-dependent reactions happen? What are the three products? What does the Calvin cycle need?”
- Summary: “Plants convert light energy into chemical energy in two stages. The light reactions make ATP and NADPH; the Calvin cycle uses them to build glucose from CO2.”
Best for: lectures, textbook chapters, and any material you will revise more than once. The built-in cue column turns every page into a self-test.
2. The Outline Method
The outline method organises information as a hierarchy: main topics, subtopics, and details, each indented one level deeper. It is the fastest method to learn because it mirrors how most textbooks are already structured.
How to do it, step by step:
- Write the main topic as a top-level heading.
- Add subtopics as indented bullet points beneath it.
- Add facts, definitions, and examples as a third level of indentation.
- Keep each point to one line. If a point needs two lines, it probably contains two ideas, so split it.
Worked example: photosynthesis
- Photosynthesis
- Site: chloroplast
- Thylakoid membranes: light-dependent reactions
- Stroma: Calvin cycle
- Overall equation: 6CO2 + 6H2O gives C6H12O6 + 6O2
- Factors affecting the rate
- Light intensity
- CO2 concentration
- Temperature
- Site: chloroplast
Best for: well-structured textbook material and subjects with clear hierarchies, like biology classifications or accounting standards.
3. Mind Mapping
A mind map puts the central topic in the middle of the page and grows branches outward for each subtopic. It trades neatness for connections, which makes it powerful for essay subjects where you must link ideas together.
How to do it, step by step:
- Write the topic in the centre of a blank page and circle it.
- Draw one branch for each major subtopic. Use a single keyword per branch, not sentences.
- Add smaller branches for details, facts, and examples.
- Use colour or symbols to mark the points you find hardest; those are your revision priorities.
Worked example: photosynthesis. Centre circle: Photosynthesis. Four main branches: Site (chloroplast, thylakoid, stroma), Stages (light-dependent, Calvin cycle), Equation (6CO2 + 6H2O to glucose + O2), Factors (light, CO2, temperature). Under Stages, smaller branches note inputs and outputs of each stage, with a link drawn between “ATP/NADPH” on the light branch and the Calvin cycle branch, showing the connection.
Best for: brainstorming, essay planning, and revision overviews where seeing the whole topic at a glance matters more than fine detail.
4. The Charting Method
When a topic is really a set of comparisons, a table beats paragraphs. The charting method organises facts into rows and columns so differences jump out at you.
How to do it, step by step:
- List the items you are comparing as row headings.
- List the features you are comparing as column headings.
- Fill each cell with the shortest accurate phrase you can manage.
- Read down each column afterwards; any column where every cell says the same thing is not helping you, so replace it.
Worked example: photosynthesis
| Stage | Location | Inputs | Outputs | Needs light directly? |
|---|---|---|---|---|
| Light-dependent reactions | Thylakoid membranes | Water, ADP, NADP+ | Oxygen, ATP, NADPH | Yes |
| Calvin cycle | Stroma | CO2, ATP, NADPH | Glucose | No |
Best for: comparison-heavy topics: mitosis vs meiosis, debit vs credit rules, audit risk vs business risk. If your exam asks “distinguish between”, chart it.
5. The Sentence Method
The sentence method is the simplest of all: write each new idea as a numbered sentence. It is not elegant, but it is the best survival tool for a fast lecture where organising live is impossible.
How to do it, step by step:
- Number each new point as it comes: 1, 2, 3.
- One idea per sentence. Keep sentences short.
- After the lecture, rewrite the sentences into Cornell or outline format. The rewriting is where the learning happens.
Worked example: photosynthesis
- Photosynthesis converts light energy into chemical energy stored in glucose.
- It takes place inside chloroplasts.
- The light-dependent reactions split water and release oxygen.
- They also produce ATP and NADPH.
- The Calvin cycle uses ATP and NADPH to fix carbon dioxide into glucose.
Best for: fast-paced lectures. Treat sentence notes as raw material, not finished notes; always convert them within a day.
6. Flow-Based Notes
Some topics are processes, not lists. Flow-based notes use arrows, boxes, and short labels to show how one step leads to the next, which mirrors how exam questions on processes are actually asked.
How to do it, step by step:
- Identify the starting point of the process and the end point.
- Lay out each step as a box in sequence, connected by arrows.
- Label each arrow with what causes the move: an input, an enzyme, a condition.
- Add side branches for anything that can speed up, slow down, or break the process.
Worked example: photosynthesis. Light energy hits chlorophyll, which splits water (arrow labelled “photolysis”), releasing oxygen as a by-product. The released energy forms ATP and NADPH (arrow labelled “light-dependent reactions”). ATP and NADPH flow into the Calvin cycle, where carbon dioxide is fixed step by step into glucose (arrow labelled “carbon fixation”). A side note records that low CO2 or dim light slows the whole chain.
Best for: cycles and cause-and-effect chains: the accounting cycle, audit procedures, metabolic pathways, historical timelines.
7. The Blurting Method
Blurting is a revision method rather than a first-draft method, and it is brutally effective. You read a topic, close the book, and write down everything you remember. The gaps in your blurt are exactly what you need to study.
How to do it, step by step:
- Read one topic carefully, then close the book.
- On a blank page, write everything you remember. Do not peek.
- Open the book and check. Add everything you missed in a different colour pen.
- The coloured additions are your personal weak spots. Re-blurt them tomorrow.
Worked example: photosynthesis. After reading the chapter, you blurt: “chloroplast, light reactions make ATP, Calvin cycle makes glucose, equation 6CO2 + 6H2O.” Checking reveals you forgot NADPH, the thylakoid vs stroma locations, and oxygen as a by-product. Those three gaps, written in red, become tomorrow’s five-minute revision.
Best for: final revision and active recall. Use it in the last weeks before the exam, when testing beats rereading.
Which Method Should You Use for Your Subject?
Match the method to the material, not to your mood:
| Situation | Use this method |
|---|---|
| Live lectures | Cornell (or sentence notes, converted to Cornell later) |
| Dense textbook chapters | Outline |
| Essay subjects needing linked arguments | Mind mapping |
| “Distinguish between” topics | Charting |
| Processes and cycles | Flow-based notes |
| Last-month revision | Blurting |
Most strong students use two or three methods: Cornell for daily learning, charting or flow notes for tricky topics, and blurting for final revision. Notes are a system, not a single technique.
Free Cornell Notes Template
To make starting easy, we have made a free printable Cornell notes template: one clean A4 page with the cue column, notes column, and summary strip already laid out. Print a stack, punch holes, and keep them in a binder, one page per lecture or chapter.
Download the free Cornell notes template (PDF)
5 Mistakes That Make Study Notes Useless
- Copying the textbook word for word. Transcription feels productive and teaches nothing. If you can write it without thinking, your brain is not engaged. Paraphrase every point.
- Highlighting everything. When the whole page is yellow, nothing stands out. Highlight only after you finish a section, and only the lines you would put in your notes.
- Never revising the notes. Notes you write and never reopen are just delayed procrastination. Schedule three passes: next day, next week, next month.
- One wall of text. Unstructured notes are unrevisable notes. Headings, indentation, and white space are not decoration; they are how your eyes find things under exam pressure.
- Designing instead of studying. Colour-coded, washi-taped notes look wonderful on camera and take three times as long to make. Spend that time on blurting instead.
Frequently Asked Questions
Should I handwrite or type my study notes?
Research generally favours handwriting for retention, because it forces you to paraphrase rather than transcribe. But typed notes that you reorganise and self-test from beat handwritten notes you never revise. Pick the format you will actually revisit.
How long should effective study notes be?
A useful rule: one page of notes per ten pages of textbook, or one Cornell page per lecture hour. If your notes are longer than that, you are copying, not condensing.
Is it okay to use someone else’s notes?
As a supplement, yes. As a replacement, no. The learning happens while you decide what matters enough to write down. Borrowed notes skip that step entirely.
How often should I revise my notes?
Three passes work for most students: the day after you make them, a week later, and a month later. Each pass should be active: cover the page and recall, or blurt the topic from memory.
Good notes are only half the battle; the other half is a realistic plan for when you will revise them. Our free weekly study planner shows you how to schedule revision across the week, and the free study timetable generator builds a full day-by-day plan from your subjects and exam date.

CA L Awrak is a Chartered Accountant writing on CA exams, tax and finance careers.
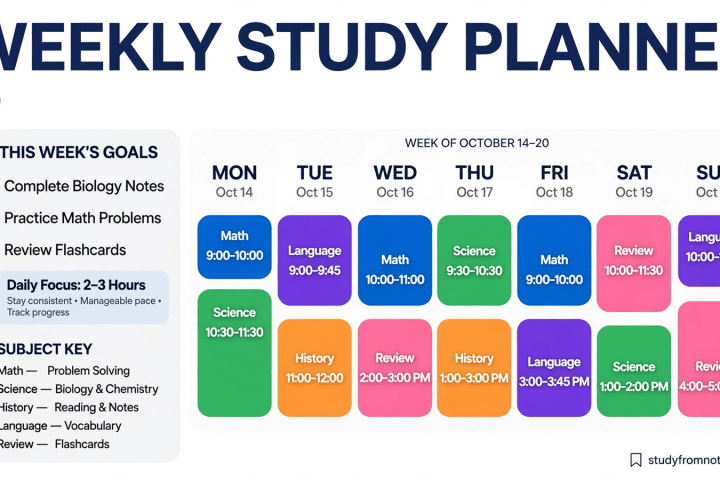
[…] your planner with good notes and the system compounds: learn how to make effective study notes so every planned session produces material you can actually revise […]
[…] technique. You cannot space what you never understood. Study the topic once, properly, using good study notes. The first review comes […]